> ## Documentation Index
> Fetch the complete documentation index at: https://gcore-doc-1256a.mintlify.site/llms.txt
> Use this file to discover all available pages before exploring further.
# Manage a Virtual GPU cluster
After [creating a Virtual GPU cluster](/edge-ai/ai-infrastructure/create-a-virtual-gpu-cluster), use the cluster details page to monitor nodes, manage power state, configure disks and network interfaces, and delete cluster resources.
## Access cluster details
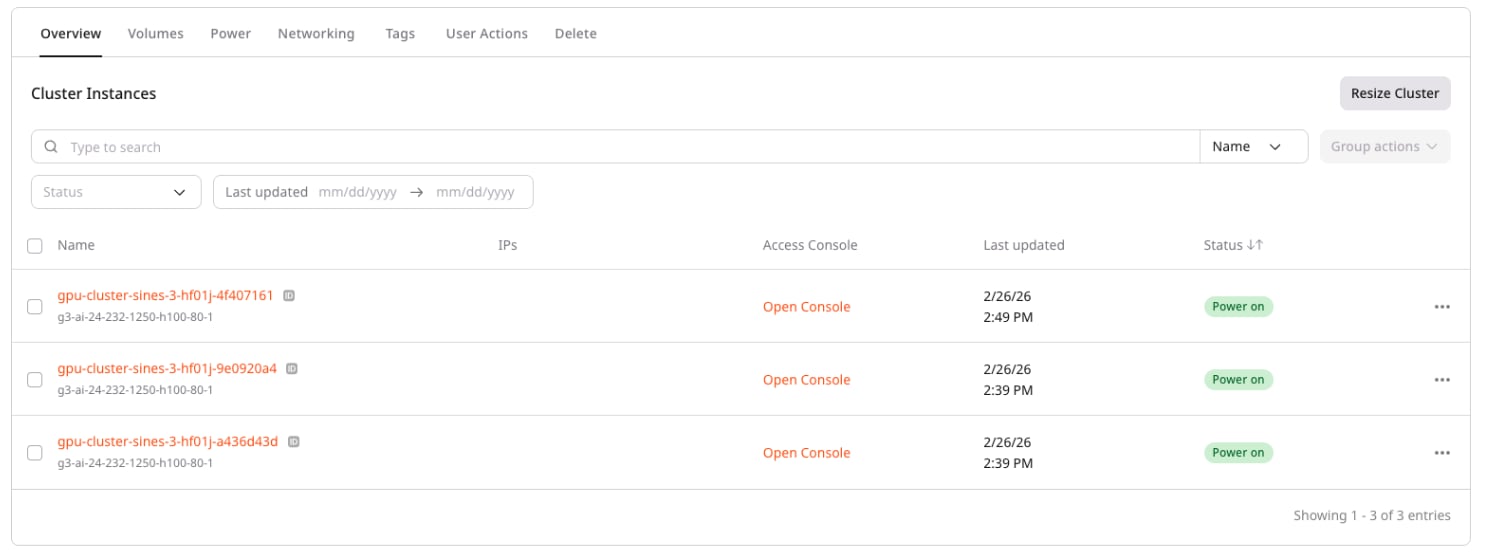
To view and manage an existing cluster, open the cluster details page.
1. In the [Gcore Customer Portal](https://portal.gcore.com), navigate to **GPU Cloud**.
2. Select **Sines-3** region.
3. In the sidebar, expand **GPU Clusters** and select **Virtual GPU Clusters**.
4. Click on a cluster name to open the details page.
The page is organized into tabs: **Overview**, **Volumes**, **Networking**, **Power**, **Tags**, **User Actions**, and **Delete**.
 ## Manage cluster power state
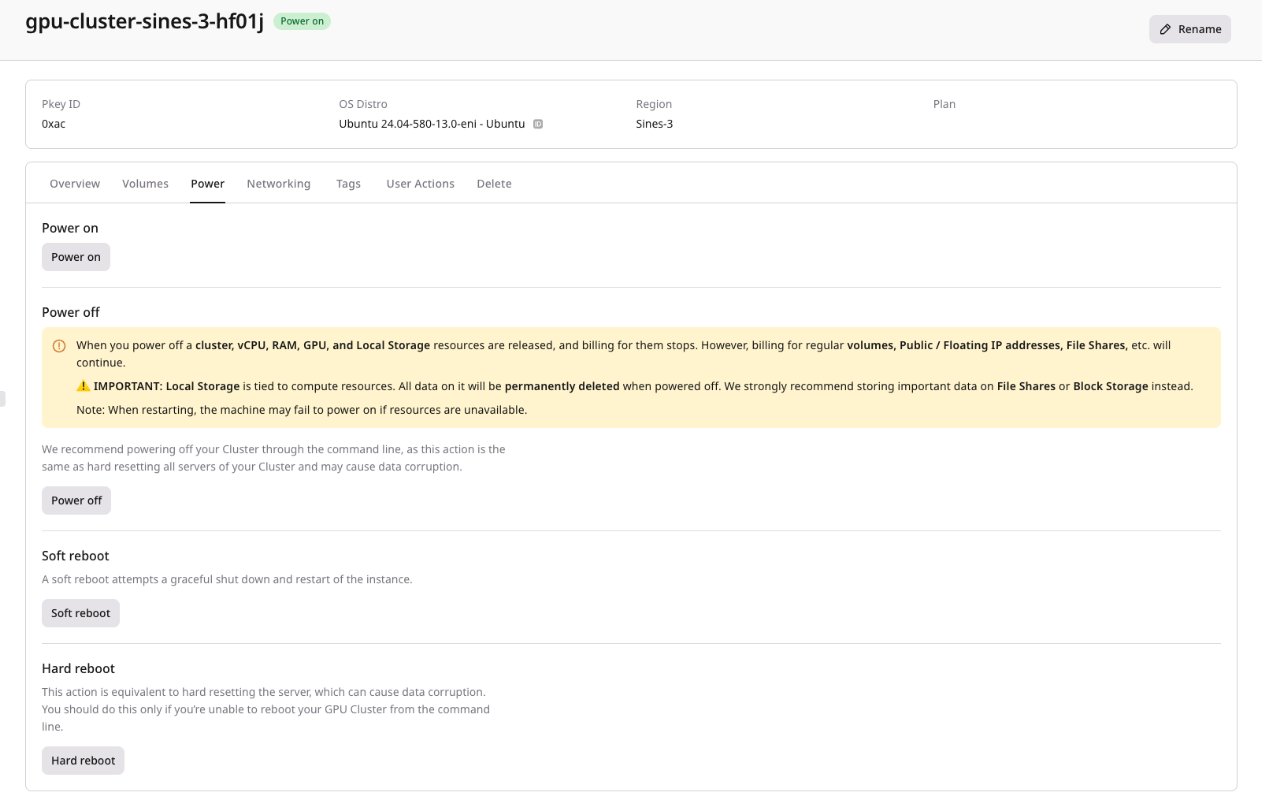
Virtual GPU clusters support power management operations at the cluster level. Unlike Bare Metal clusters, powering off a Virtual GPU cluster releases compute resources (shelving), which stops billing but also removes data from local disks.
## Manage cluster power state
Virtual GPU clusters support power management operations at the cluster level. Unlike Bare Metal clusters, powering off a Virtual GPU cluster releases compute resources (shelving), which stops billing but also removes data from local disks.
 ### Power off (shelve) a cluster
Powering off a Virtual GPU cluster shelves all nodes. Shelving releases CPU, RAM, GPU, and local disk resources. No charges apply while nodes are shelved.
1. In the cluster list or cluster details page, locate the cluster.
2. Click the **Power Off** action.
3. Confirm the operation.
**Warning**
When a node is shelved, the local data disk is deleted and all data on it is lost. Only network disks persist. Save important data to network disks or external storage before powering off.
### Power on a cluster
Powering on a shelved cluster attempts to allocate resources for all nodes.
1. In the cluster list or cluster details page, locate the powered-off cluster.
2. Click the **Power On** action.
**Warning**
Restart is not guaranteed after shelving. If the requested resources (GPU model, flavor) are not available in the region at the time of power on, the operation fails. For workloads requiring guaranteed availability, use Bare Metal clusters.
## Manage node disks
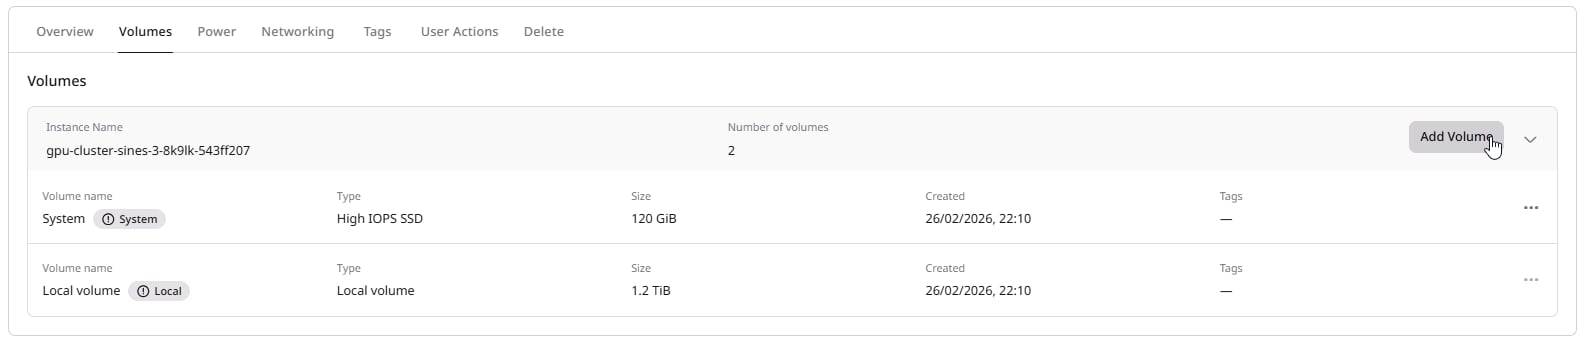
After cluster creation, disks can be managed individually for each node. This allows adding storage to specific nodes or removing unused disks.
### Add a disk to a node
1. Navigate to the cluster details page.
2. Open the **Volumes** tab.
3. Select the node to attach a disk to.
4. Click **Add Volume** and configure the disk type and size.
5. Click **Create** to attach the new disk.
### Power off (shelve) a cluster
Powering off a Virtual GPU cluster shelves all nodes. Shelving releases CPU, RAM, GPU, and local disk resources. No charges apply while nodes are shelved.
1. In the cluster list or cluster details page, locate the cluster.
2. Click the **Power Off** action.
3. Confirm the operation.
**Warning**
When a node is shelved, the local data disk is deleted and all data on it is lost. Only network disks persist. Save important data to network disks or external storage before powering off.
### Power on a cluster
Powering on a shelved cluster attempts to allocate resources for all nodes.
1. In the cluster list or cluster details page, locate the powered-off cluster.
2. Click the **Power On** action.
**Warning**
Restart is not guaranteed after shelving. If the requested resources (GPU model, flavor) are not available in the region at the time of power on, the operation fails. For workloads requiring guaranteed availability, use Bare Metal clusters.
## Manage node disks
After cluster creation, disks can be managed individually for each node. This allows adding storage to specific nodes or removing unused disks.
### Add a disk to a node
1. Navigate to the cluster details page.
2. Open the **Volumes** tab.
3. Select the node to attach a disk to.
4. Click **Add Volume** and configure the disk type and size.
5. Click **Create** to attach the new disk.
 ### Remove a disk from a node
1. Navigate to the cluster details page.
2. Open the **Volumes** tab.
3. Locate the disk to remove and click the detach action.
4. Confirm the operation.
**Warning**
Detaching a disk does not delete it. The disk remains in the account and continues to incur storage charges until explicitly deleted.
## Manage network interfaces
After cluster creation, network interfaces can be managed individually for each node through the **Networking** tab on the cluster details page.
### Add an interface to a node
1. Navigate to the cluster details page.
2. Open the **Networking** tab.
3. Click on a node to expand its details.
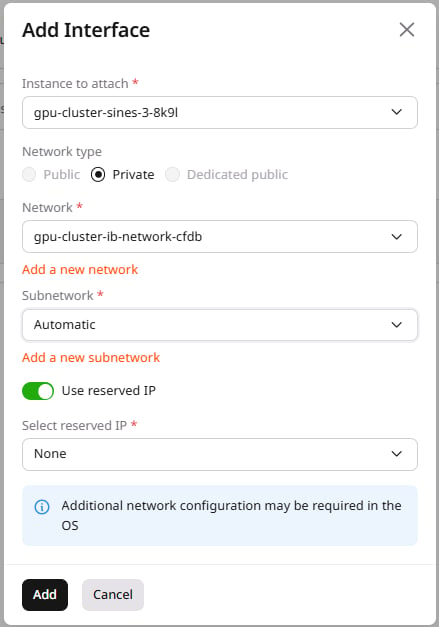
4. Click **Add Interface**.
5. Configure the **Network type** (**Public**, **Private**, or **Dedicated public**) and IP allocation settings.
### Remove a disk from a node
1. Navigate to the cluster details page.
2. Open the **Volumes** tab.
3. Locate the disk to remove and click the detach action.
4. Confirm the operation.
**Warning**
Detaching a disk does not delete it. The disk remains in the account and continues to incur storage charges until explicitly deleted.
## Manage network interfaces
After cluster creation, network interfaces can be managed individually for each node through the **Networking** tab on the cluster details page.
### Add an interface to a node
1. Navigate to the cluster details page.
2. Open the **Networking** tab.
3. Click on a node to expand its details.
4. Click **Add Interface**.
5. Configure the **Network type** (**Public**, **Private**, or **Dedicated public**) and IP allocation settings.
 ### Remove an interface from a node
1. Navigate to the cluster details page.
2. Open the **Networking** tab.
3. Click on a node to expand its details.
4. Locate the interface to remove and click the delete action.
5. Confirm the operation.
**Info**
InfiniBand interfaces cannot be removed or modified. They are managed automatically to ensure inter-node communication.
## Delete a cluster
When deleting a Virtual GPU cluster, disks attached to nodes can optionally be preserved.
**Warning**
Deleting the last node in a cluster automatically deletes the entire cluster. This applies to both UI and API/Terraform operations. When using the API or Terraform to delete nodes, no warning is displayed before the cluster is removed. Ensure at least one node remains if you want to preserve the cluster.
### Remove an interface from a node
1. Navigate to the cluster details page.
2. Open the **Networking** tab.
3. Click on a node to expand its details.
4. Locate the interface to remove and click the delete action.
5. Confirm the operation.
**Info**
InfiniBand interfaces cannot be removed or modified. They are managed automatically to ensure inter-node communication.
## Delete a cluster
When deleting a Virtual GPU cluster, disks attached to nodes can optionally be preserved.
**Warning**
Deleting the last node in a cluster automatically deletes the entire cluster. This applies to both UI and API/Terraform operations. When using the API or Terraform to delete nodes, no warning is displayed before the cluster is removed. Ensure at least one node remains if you want to preserve the cluster.
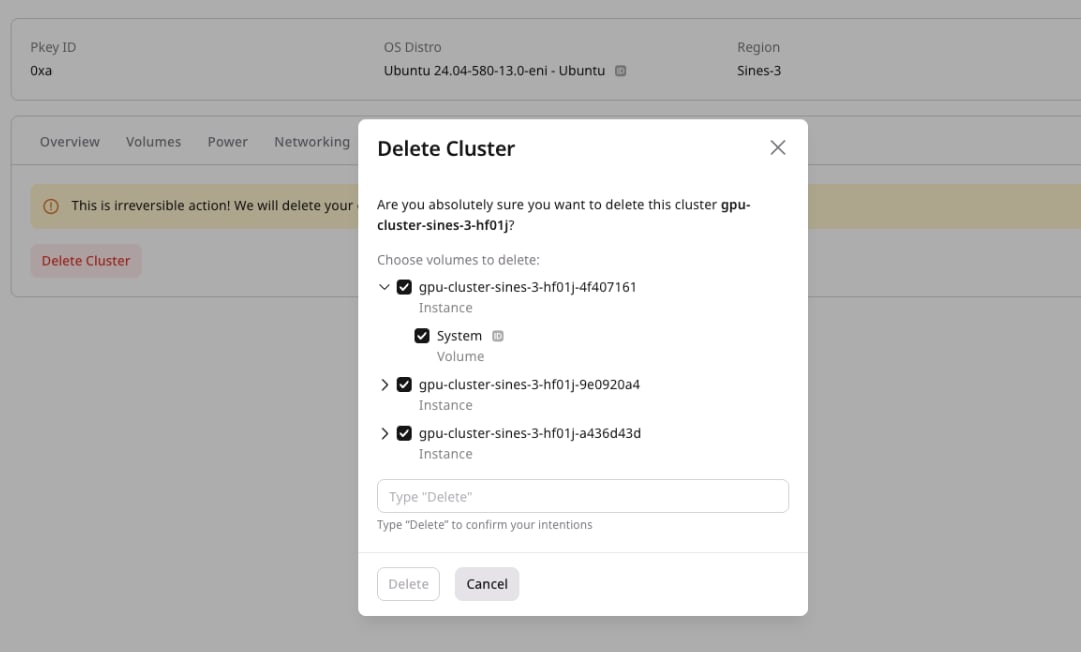 1. In the cluster list or cluster details page, click **Delete**.
2. In the confirmation dialog:
* To delete all disks along with the cluster, leave the **Delete disks** checkbox selected.
* To preserve disks for later use, clear the **Delete disks** checkbox.
3. Confirm the deletion.
**Info**
Preserved disks remain in the account and continue to incur storage charges. They can be attached to other instances or clusters.
## Automating cluster management
The [Gcore Customer Portal](https://portal.gcore.com) is suitable for managing individual clusters. For automated workflows—such as CI/CD pipelines, infrastructure-as-code, or batch provisioning—use the GPU Virtual API.
The API allows:
* Starting, stopping, and rebooting clusters
* Managing volumes attached to cluster servers
* Deleting clusters programmatically
The [GPU Virtual API reference](/api-reference/cloud/gpu-virtual) provides endpoint details and code examples.
1. In the cluster list or cluster details page, click **Delete**.
2. In the confirmation dialog:
* To delete all disks along with the cluster, leave the **Delete disks** checkbox selected.
* To preserve disks for later use, clear the **Delete disks** checkbox.
3. Confirm the deletion.
**Info**
Preserved disks remain in the account and continue to incur storage charges. They can be attached to other instances or clusters.
## Automating cluster management
The [Gcore Customer Portal](https://portal.gcore.com) is suitable for managing individual clusters. For automated workflows—such as CI/CD pipelines, infrastructure-as-code, or batch provisioning—use the GPU Virtual API.
The API allows:
* Starting, stopping, and rebooting clusters
* Managing volumes attached to cluster servers
* Deleting clusters programmatically
The [GPU Virtual API reference](/api-reference/cloud/gpu-virtual) provides endpoint details and code examples.